|
|
Post by sw1 on Apr 8, 2014 8:14:37 GMT
I've been having a lot of fun making terrain and I'm now planning on making a tables worth of it. So rather than having my late night ramblings clog up my general hobby thread I've decided to separate the terrain side of things to here. Currently I've been knocking up some test models which my kids have laid claim to. The plan was to make these rough and ready but they've ended up getting more and more detailed as my eldest has been raiding my bits boxes like only a 6 year old can. He's managed to locate all the good bits I was planning on reserving for my scenery. Lol ... On the plus side he's now keeping an eye out for interesting bits we can use together. He's really enjoying having time just with me and I'm enjoying it as well. Just need to steer him away from starting a Smurf army. The youngest likes the look of Tau which is even more of a worry.  So the challenge is to make these fairly sturdy and hopefully I'll be "allowed" to use them as well. I'm looking for inspiration for Admec flavoured scenery so expect me to be nabbing ideas from the likes of manus. So if anyone spots anything they think looks cool ideas wise feel free to stick up a link or post up ideas. |
|
|
|
Post by Manus on Apr 8, 2014 8:58:25 GMT
Cool looking forward to seeing some more terrain - especially since it sound like the right type  Personally I kind of torn when deciding which terrain to use for AdMech. I really both want to use a lot of city/gothic terrain but also want some industrial pieces, will be interesting to see what you come up with. |
|
|
|
Post by sw1 on Apr 8, 2014 10:31:06 GMT
Hope I can do a decent job. Trying to search the site as I know someone did put up some industrial type scenery a while ago. Struggling as I'm using my phone. If anyone remembers which thread it's in can you point me in the right direction?
Cheers
sw1
|
|
|
|
Post by sw1 on Apr 8, 2014 18:19:59 GMT
Got a nice little surprise while rummaging through boxes. All my missing scenery has turned up. So I'll base up the Admec ruins before building up new stuff. I'll reserve the rest of the ruins for a later fun and games. I'm thinking the ruins would have all the important gubbins removed so they'll basically be empty shells. I've also had a closer look at the sheild generator thing that had a limited release. Looks like something that will be easy to convert up. Gonna get some pic on here tonight.  |
|
|
|
Post by sw1 on Apr 8, 2014 22:34:41 GMT
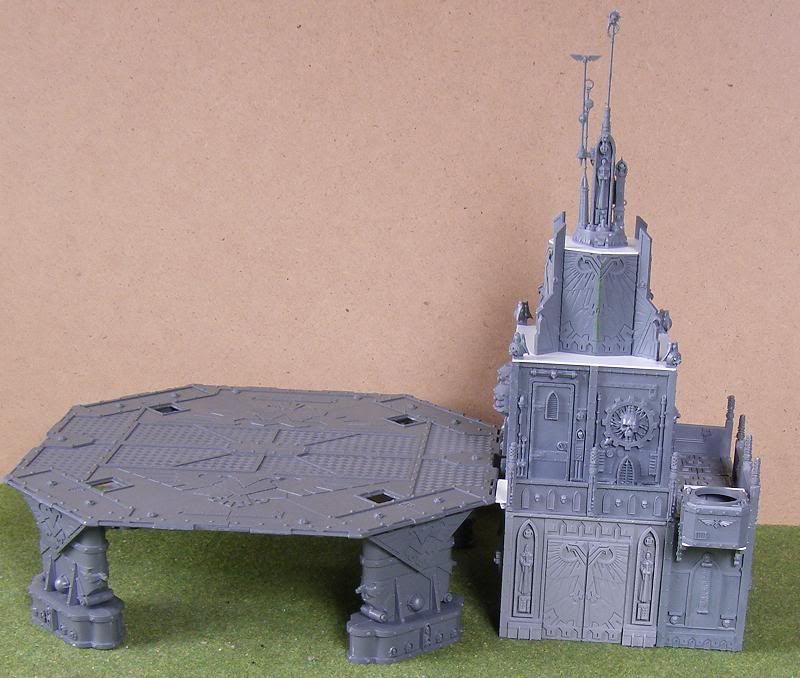
Right time for the start of the scenery pics. Here's the undercoated landing pad: 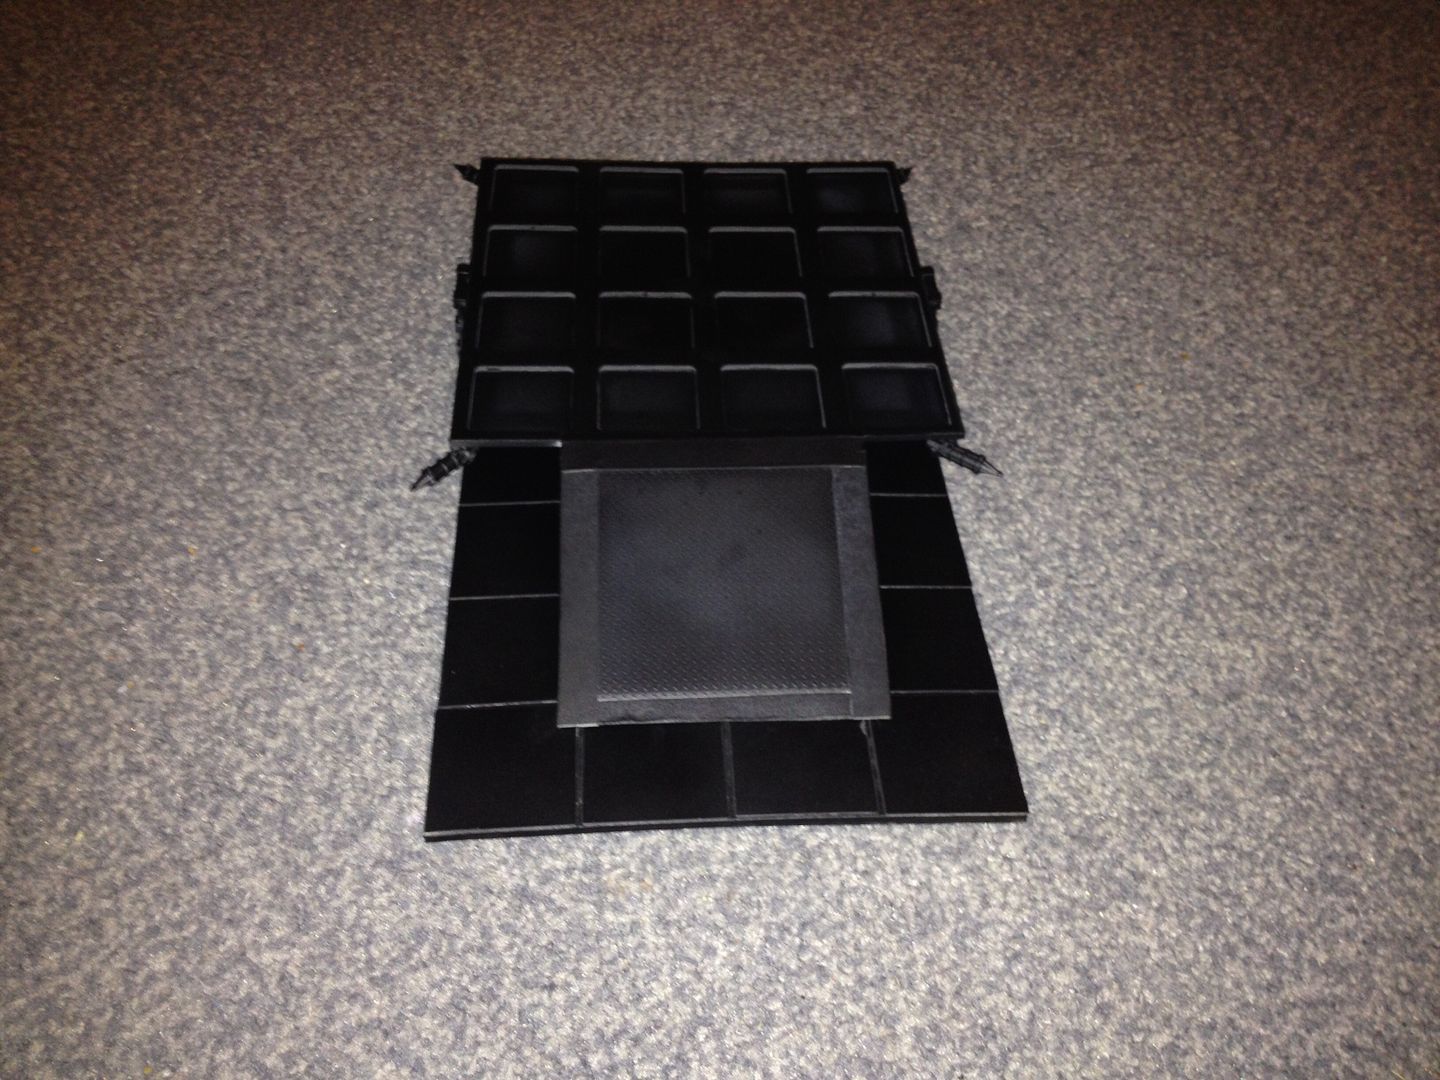 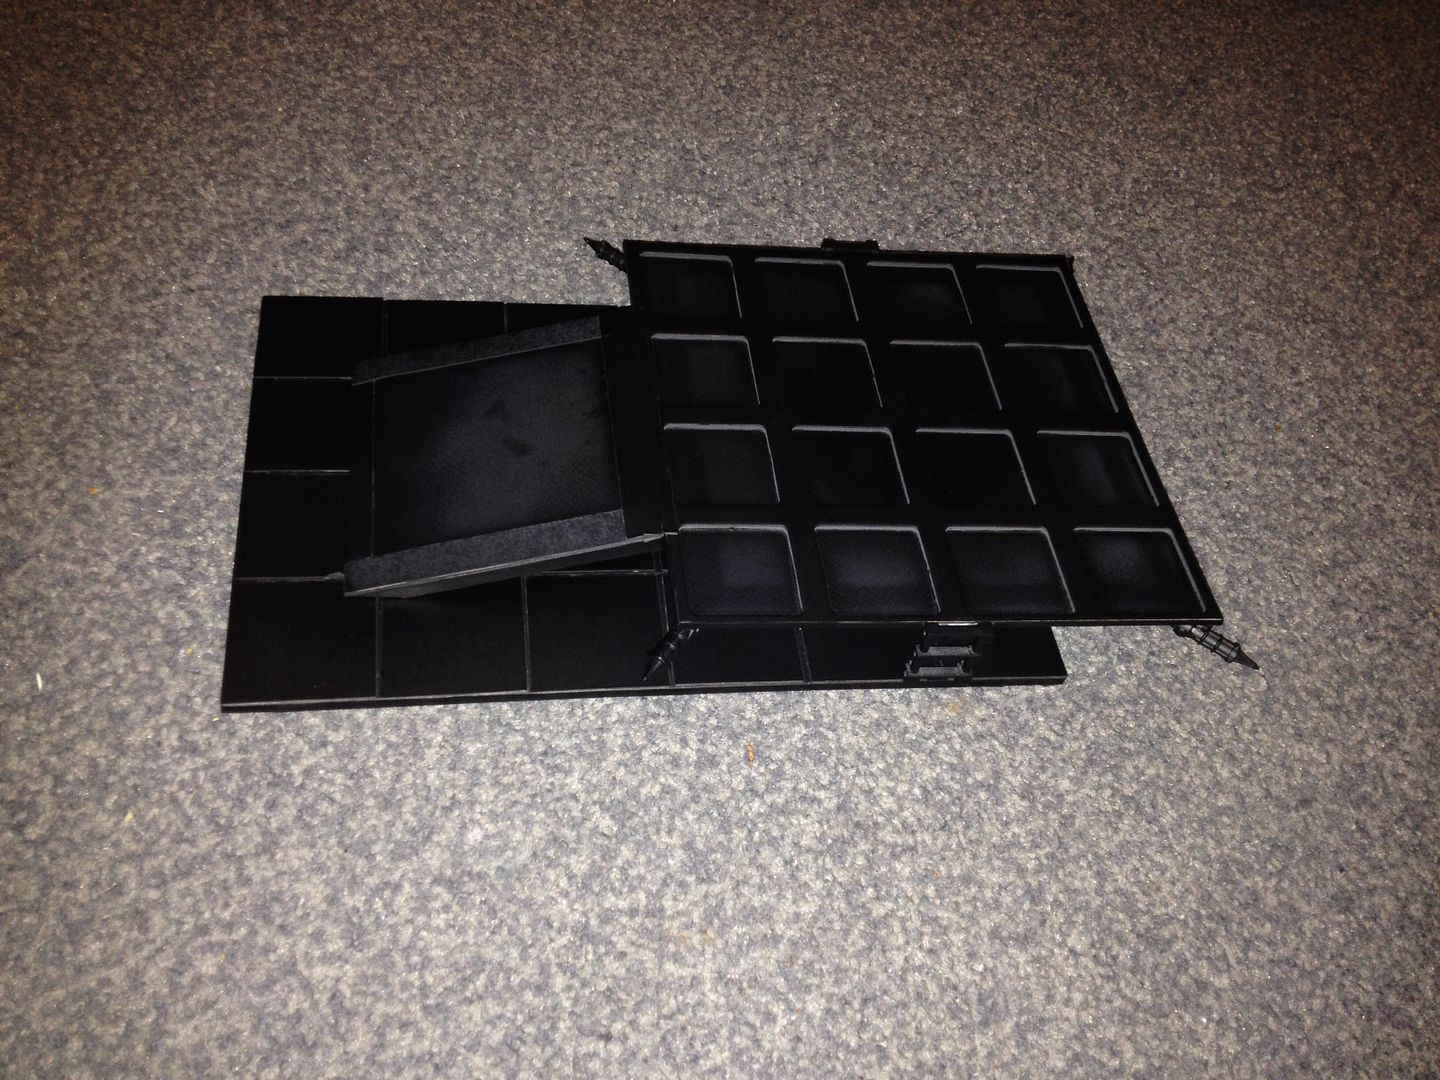 Will get some pics sorted of the ruins shortly. |
|
|
|
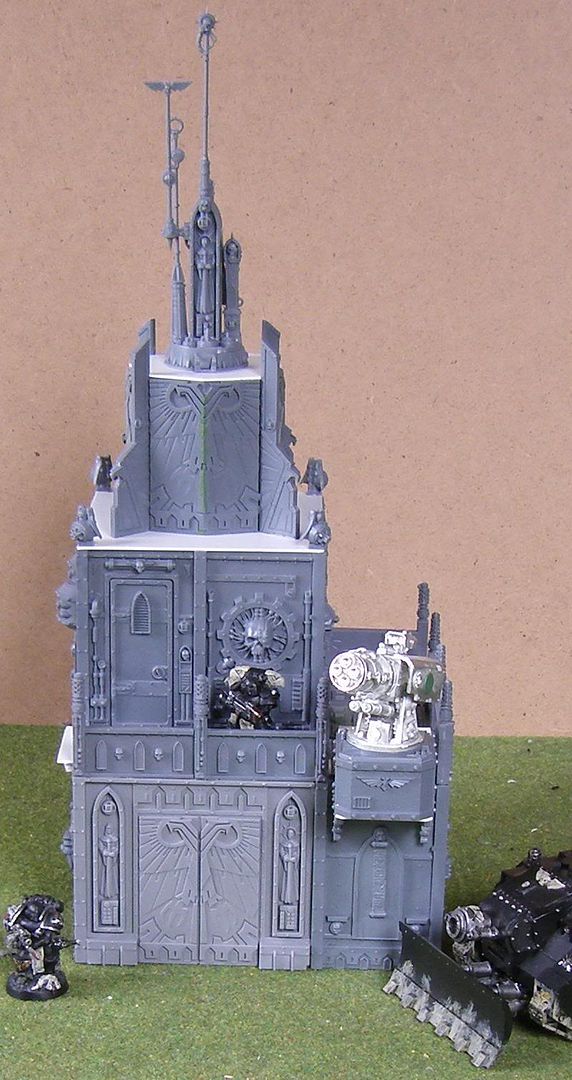
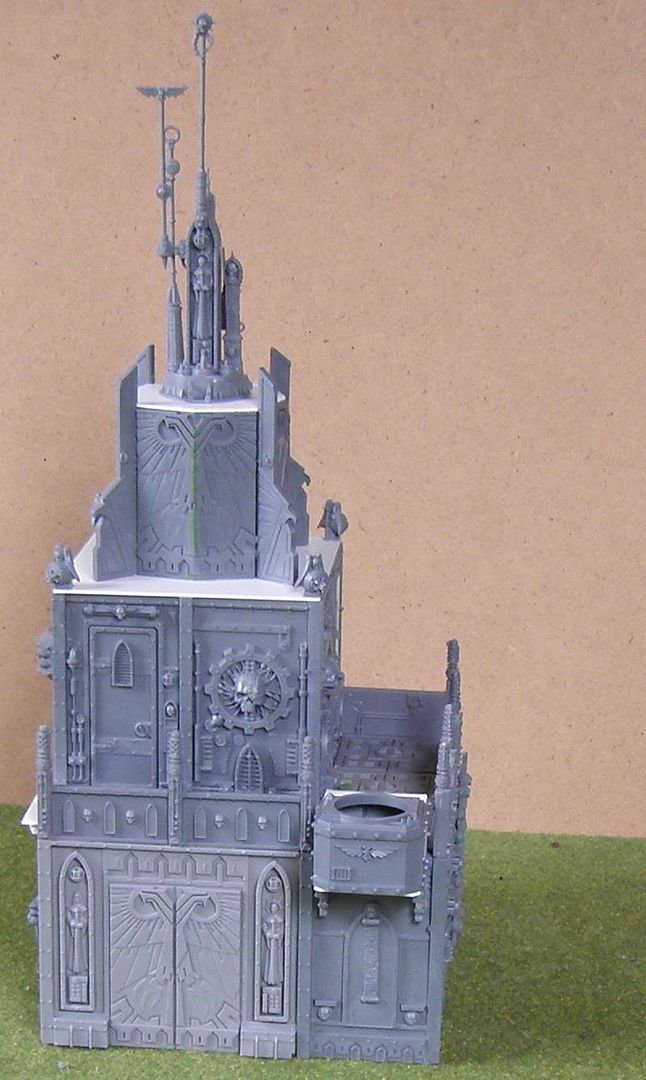
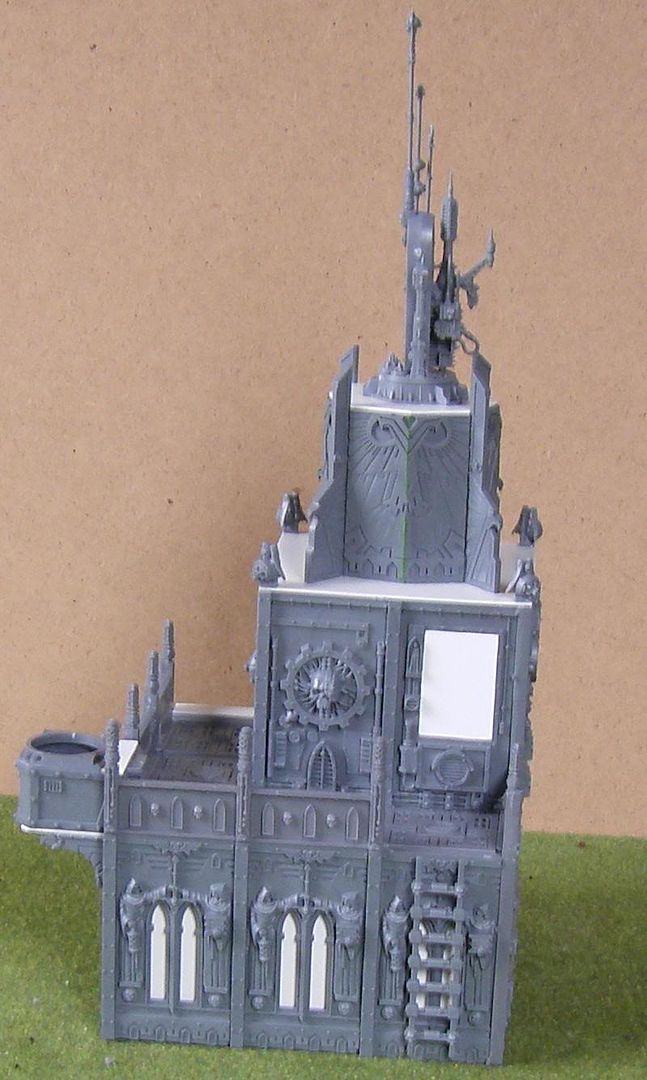
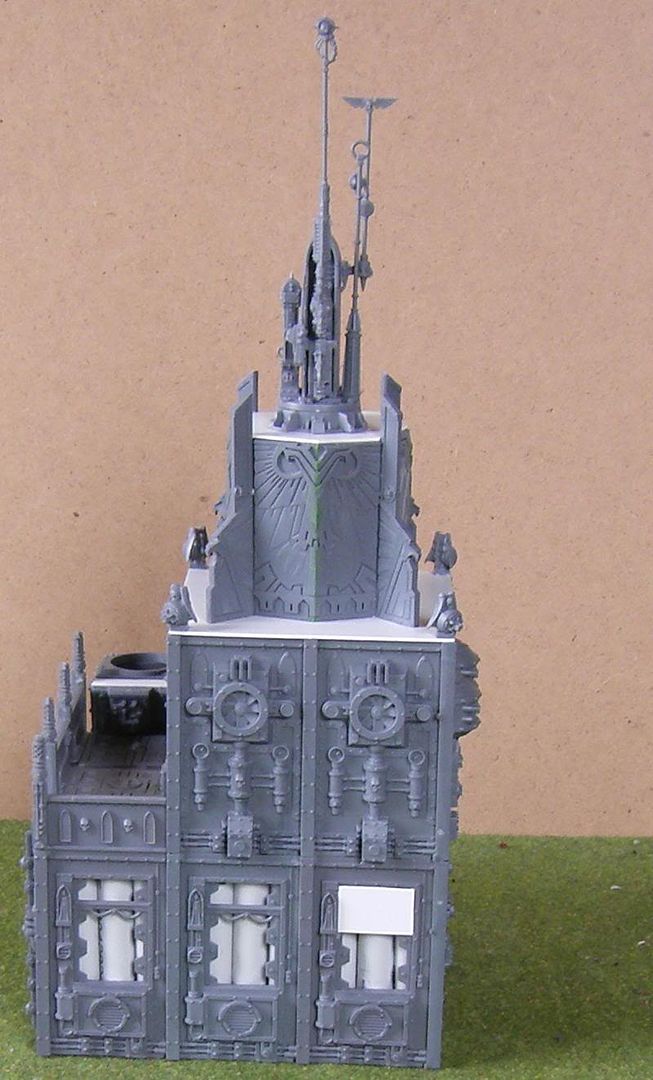
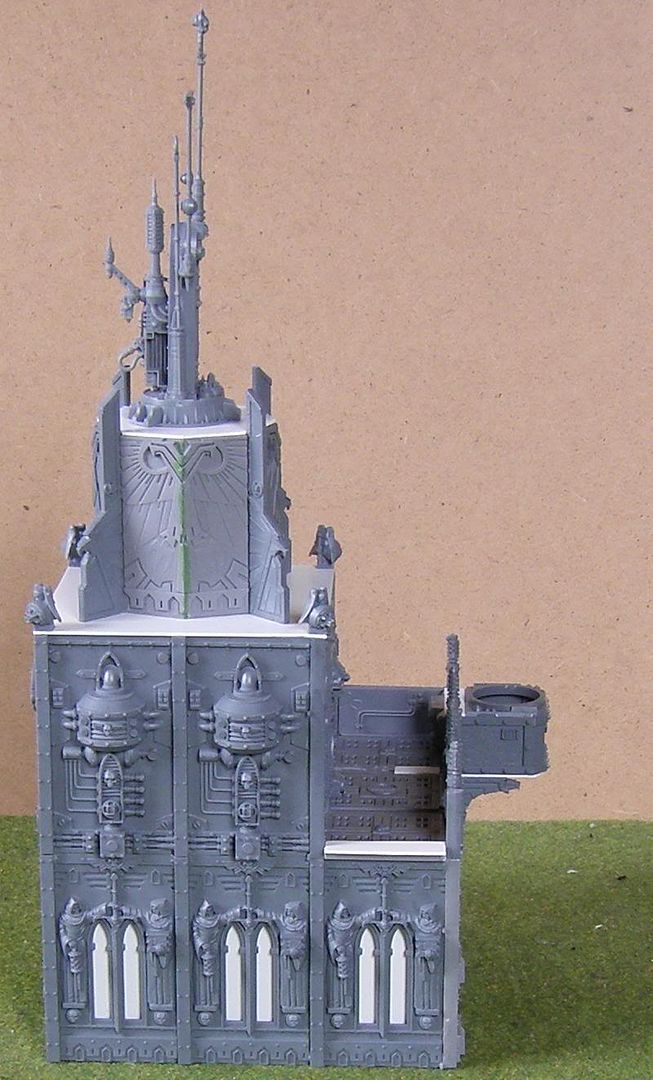
Post by sw1 on Apr 9, 2014 0:12:22 GMT
Time for the first ruin now I've got a board to mount it on. Just a front and back view plus one of the base board: 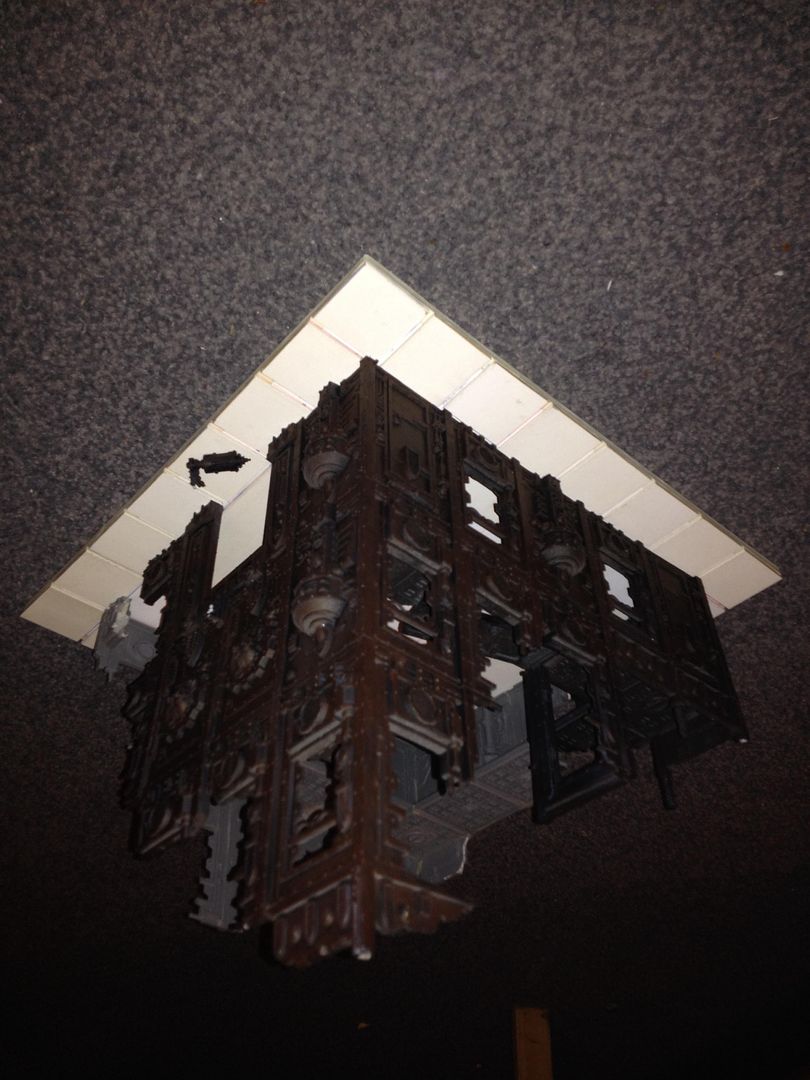 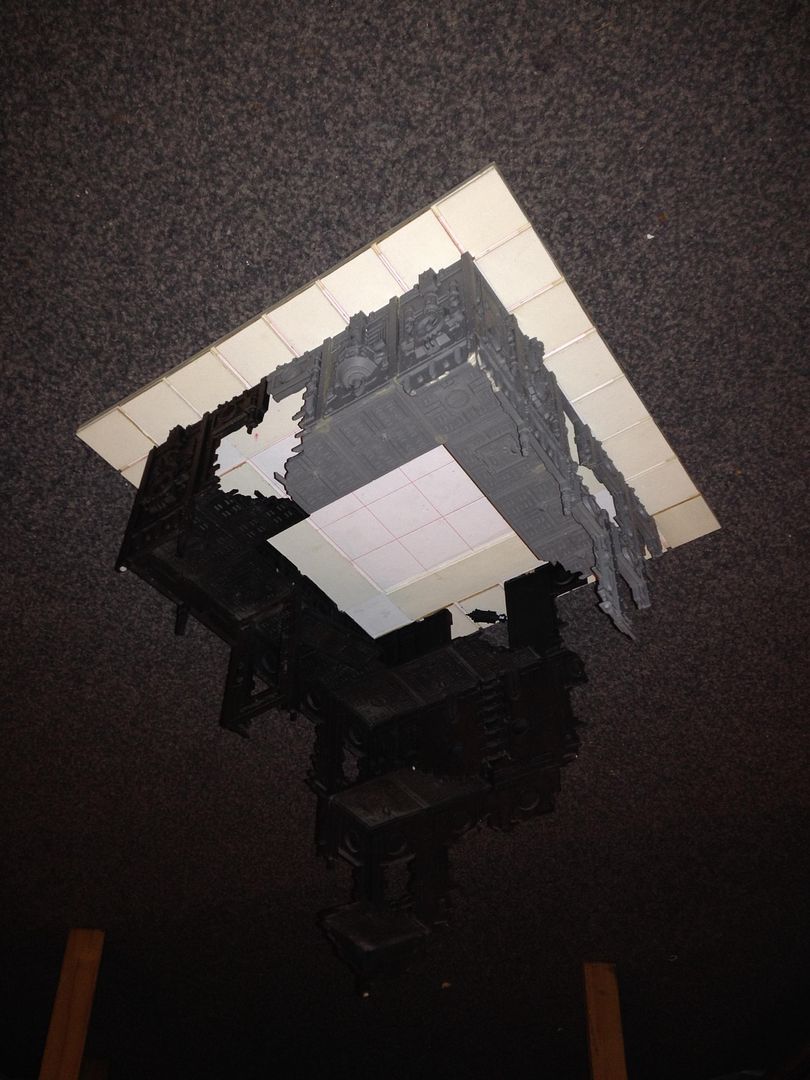 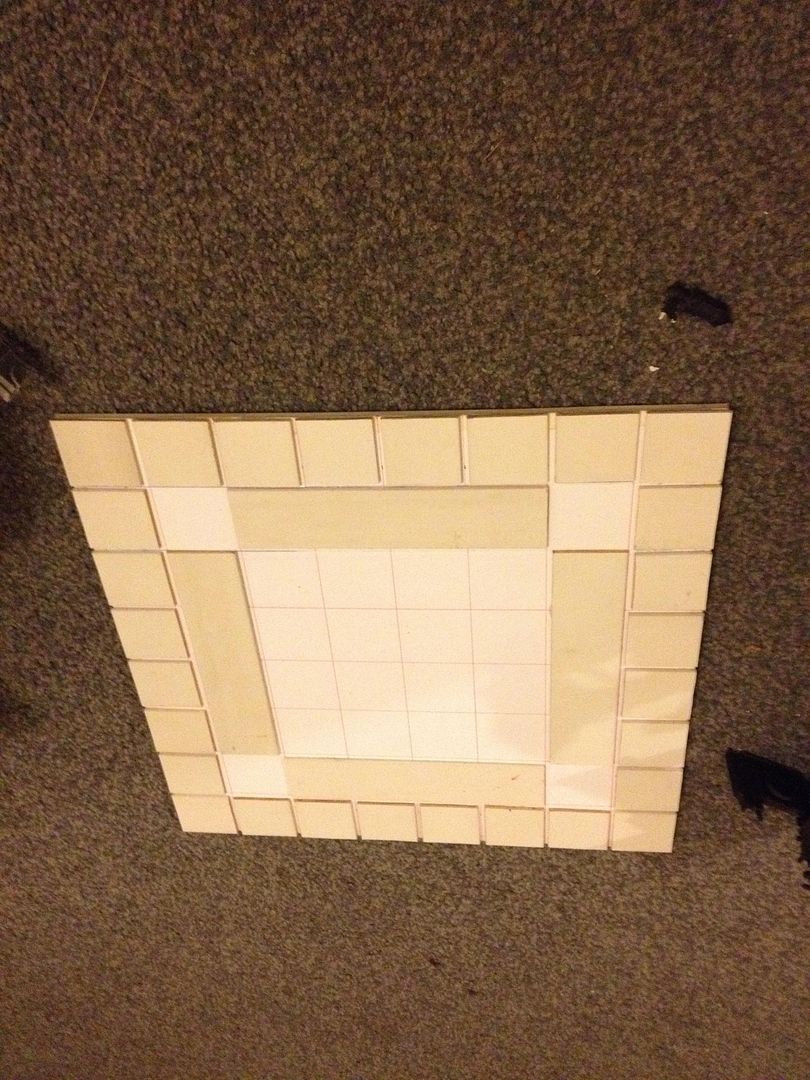 Think I'll keep it in 2 pieces while the inside gets painted then assemble and glue to the base before finishing the outside. I've had to rip all the scenery off the old boards as there was no way I'd get to all the bits to paint. I also didn't detail up the boards before assembly which would of really detracted from the finished piece. Still a fair bit of work required to get the mounting board finished. Think I might need to get hold of some more textured card. The amusing thing is the flags stones are chopped up wooded slats from a louvered blind the wife said I'd never use. I've recently had a really big change in my hobby outlook. I'd have never bothered with this stuff when I was trying to break the 1000 items (models/scenery/movement trays/etc) finished in a year. Now there's a whole lot more prep and much less rushing. The only issue I can foresee is storage as the finished stuff will take up a whole lot more room. |
|
|
|
Post by sw1 on Apr 9, 2014 1:44:32 GMT
Messing around with the base board and found the square mesh stuff I've been using cuts nicely into a 6" square which happens to be the space I need to fill in the centre. Being rather happy with myself I decided to have a rummage and see what else would fit nicely on too a 12" square board and I found the following looks rather funky: 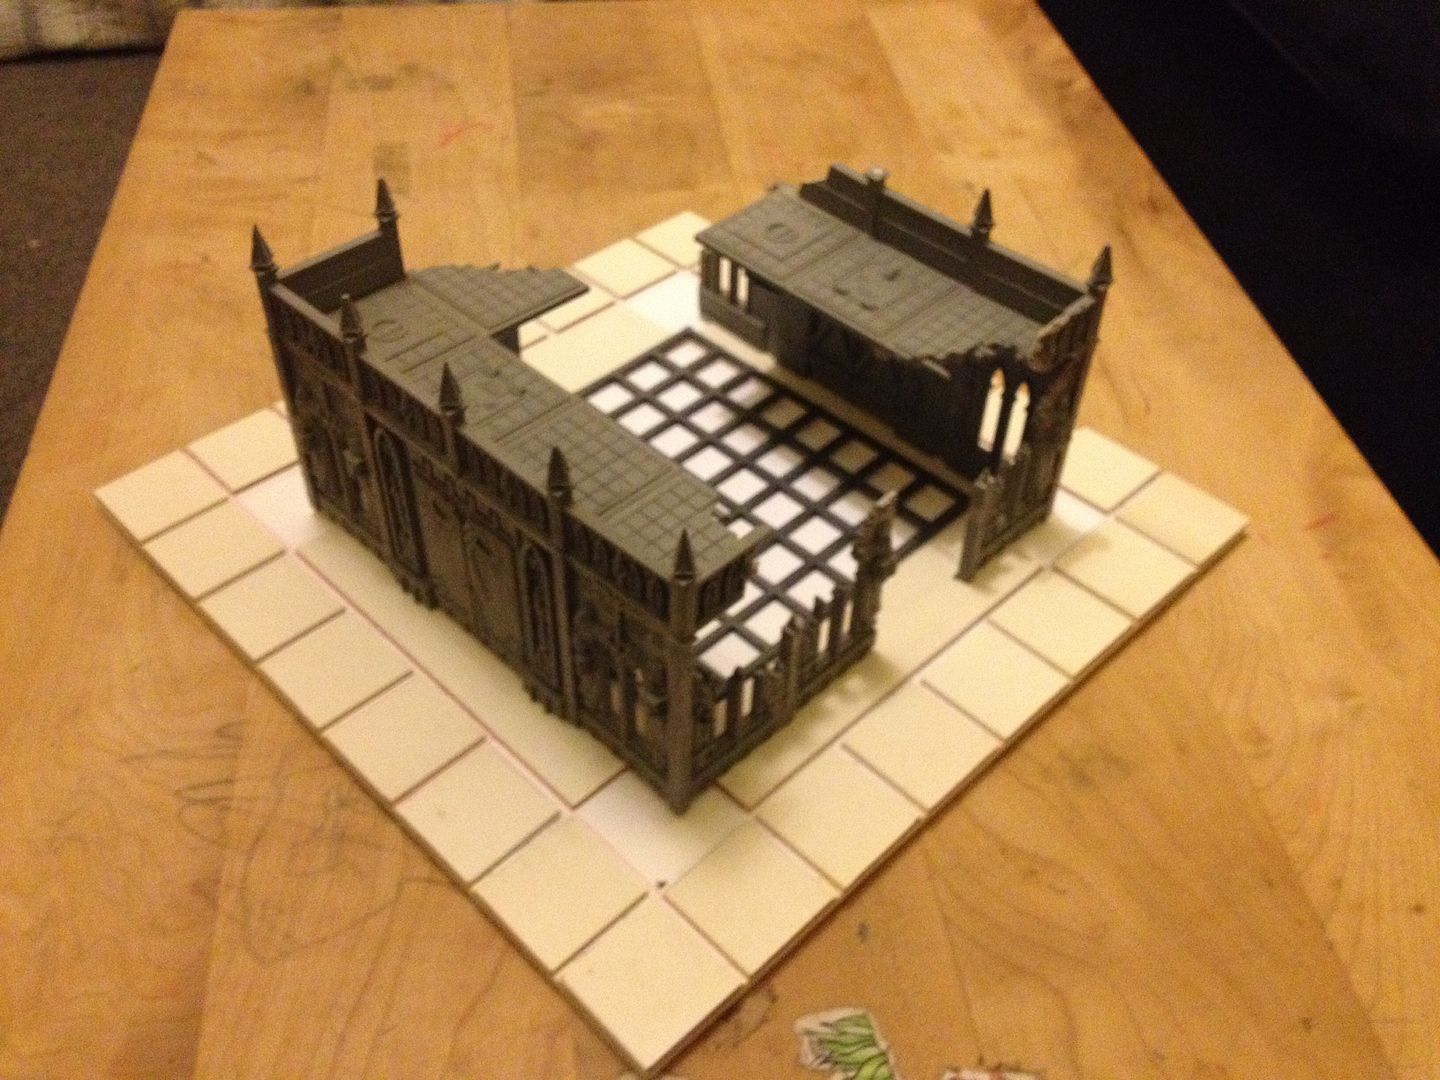 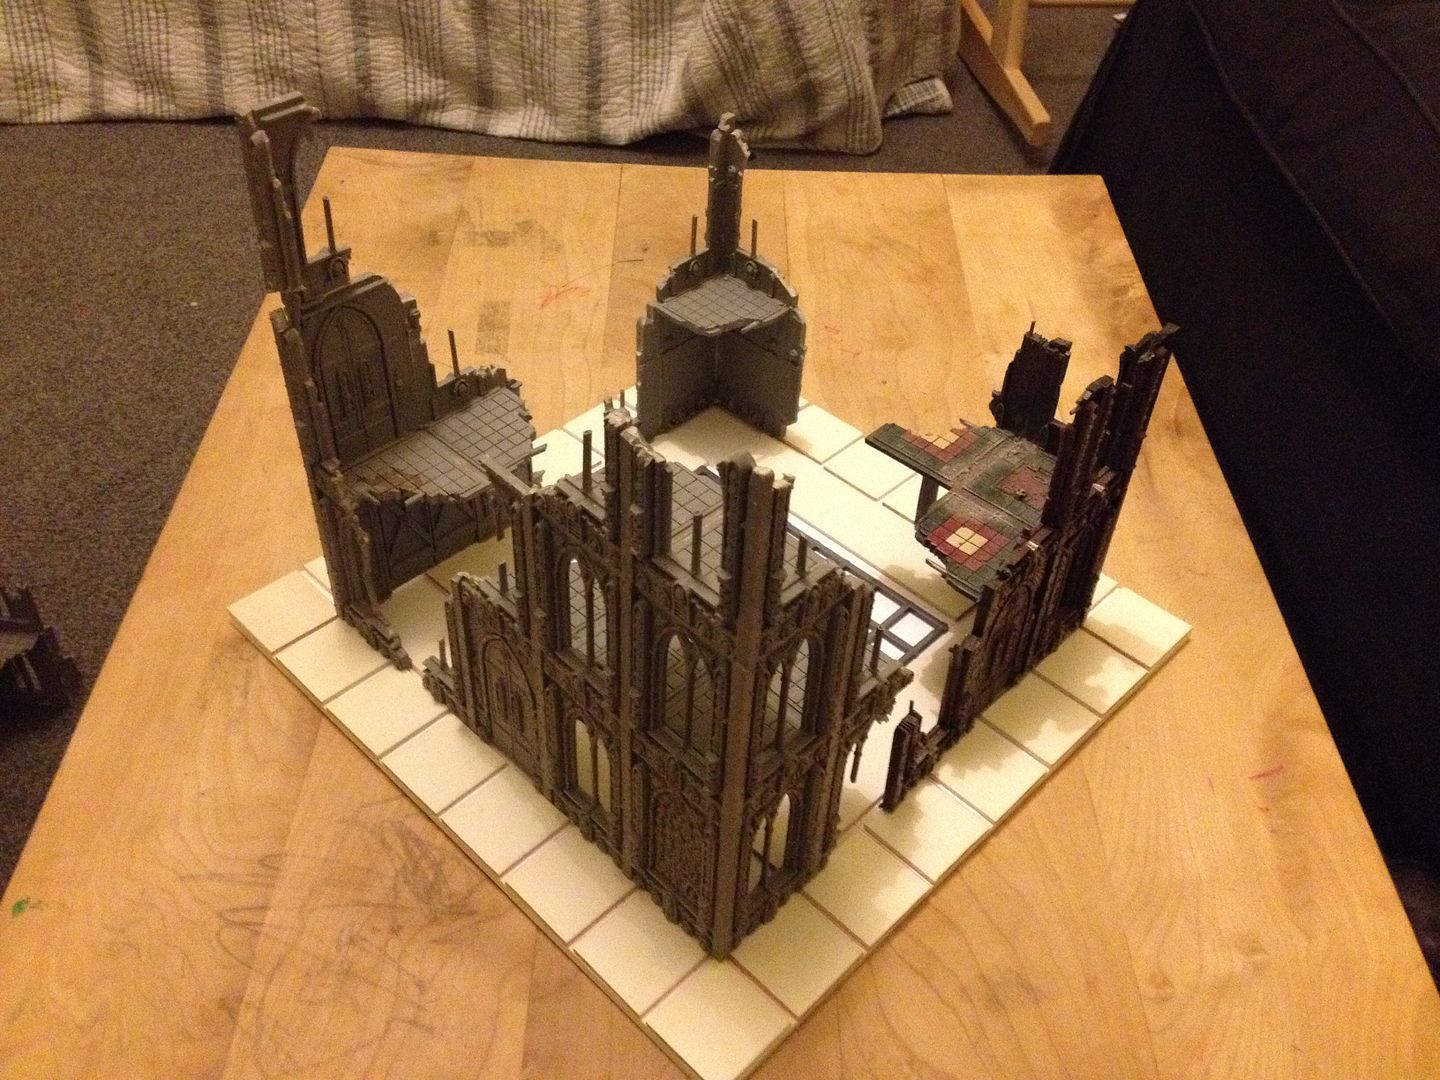 These probably would look better on a bigger board maybe with a similar 12" sat on top of a second 18" square with another set of stone flags around the outside edge: 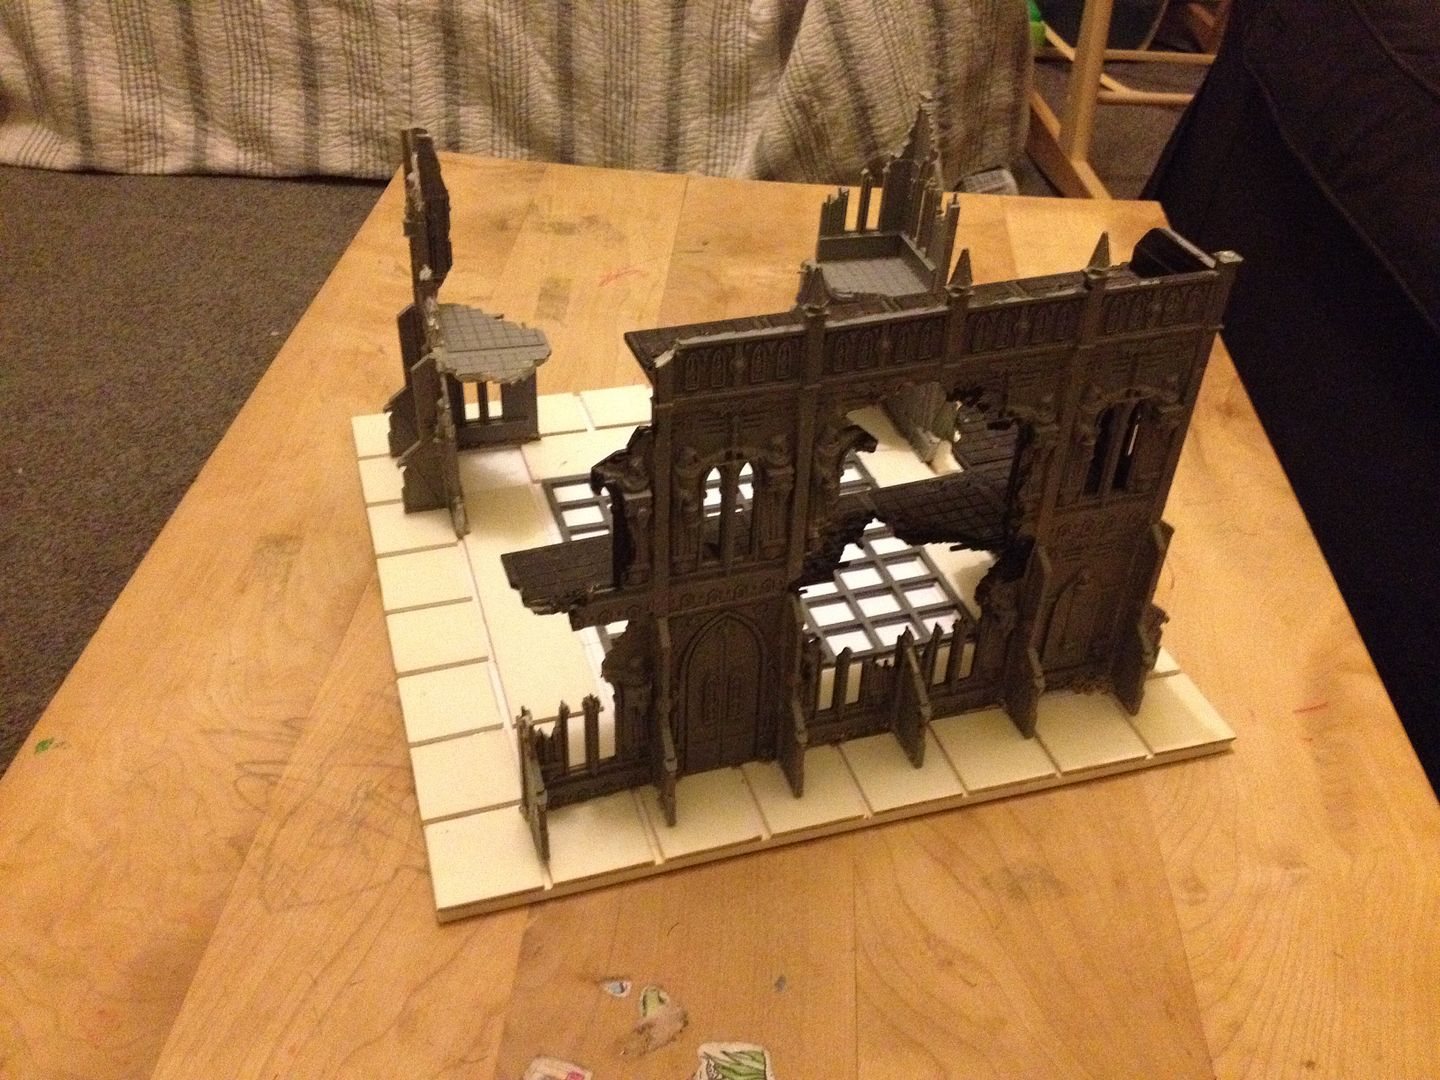 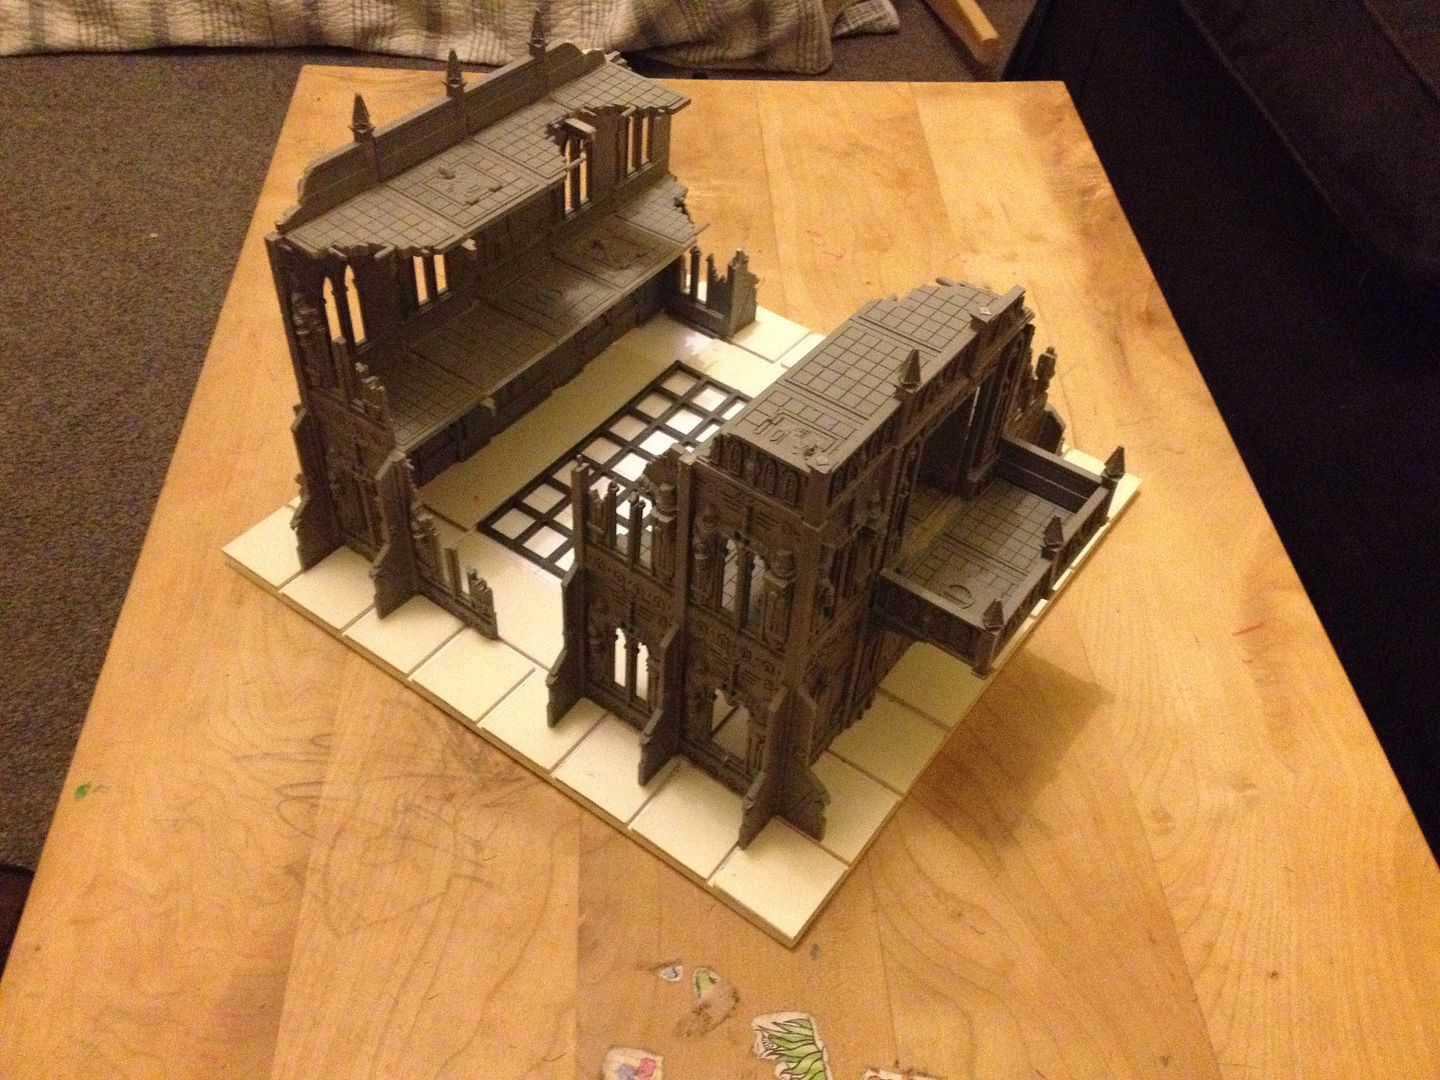 The biggest beast could probably do with a 21" or 24" square: 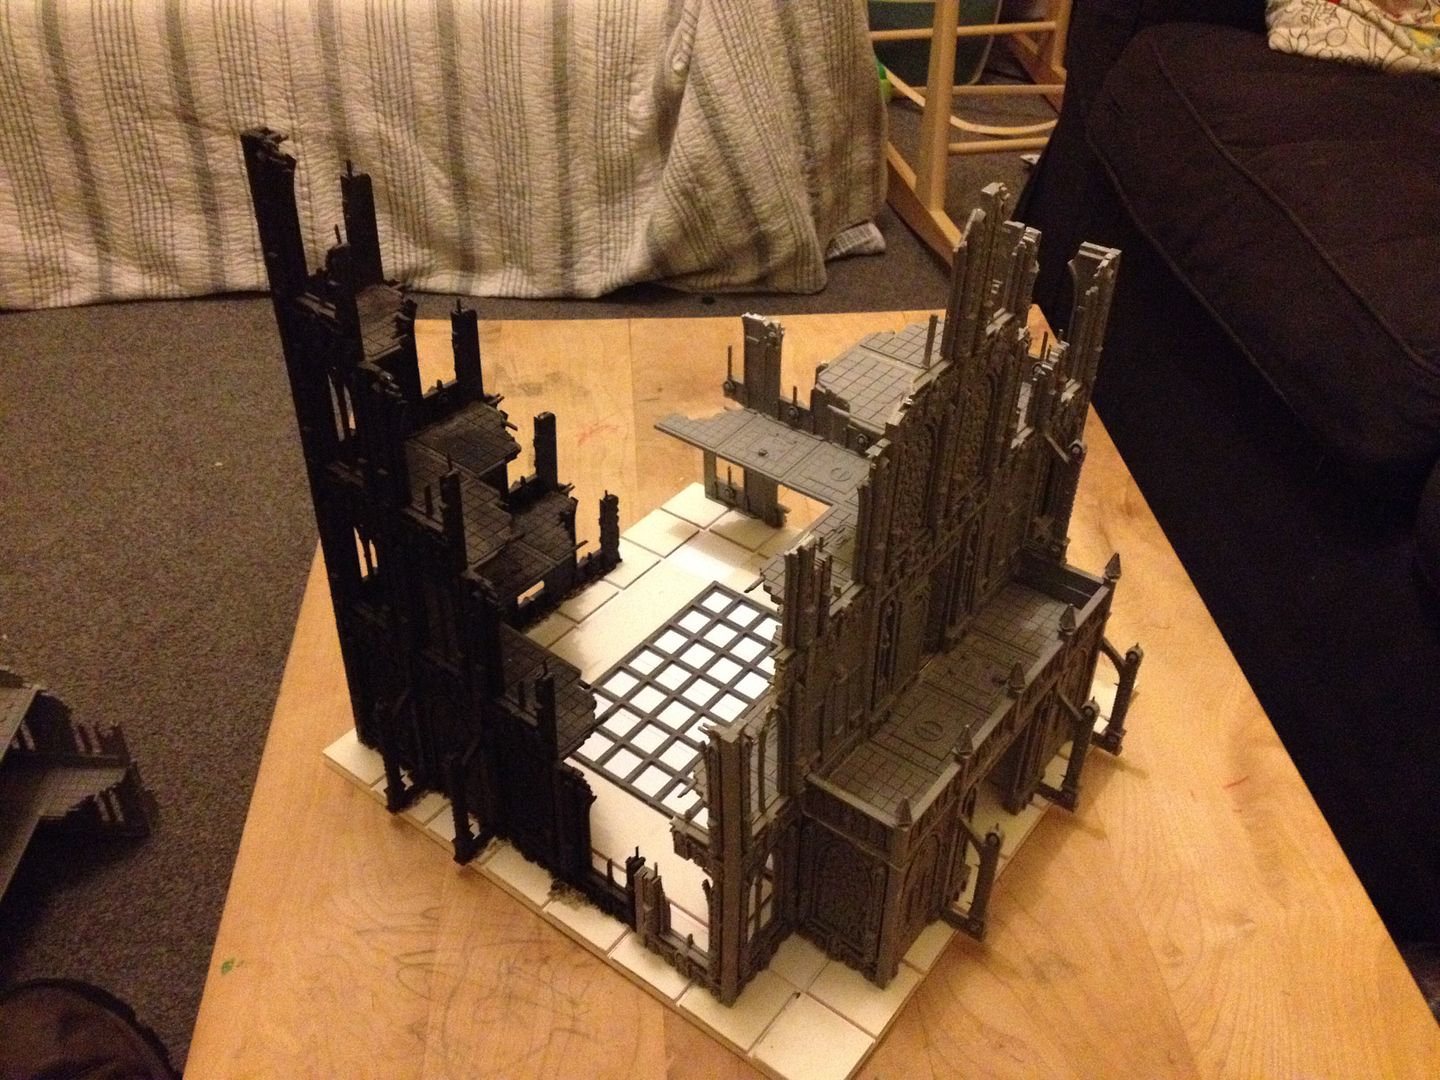 Then finally the other Admec piece which needs to go on a rectangular board 12" x 18": 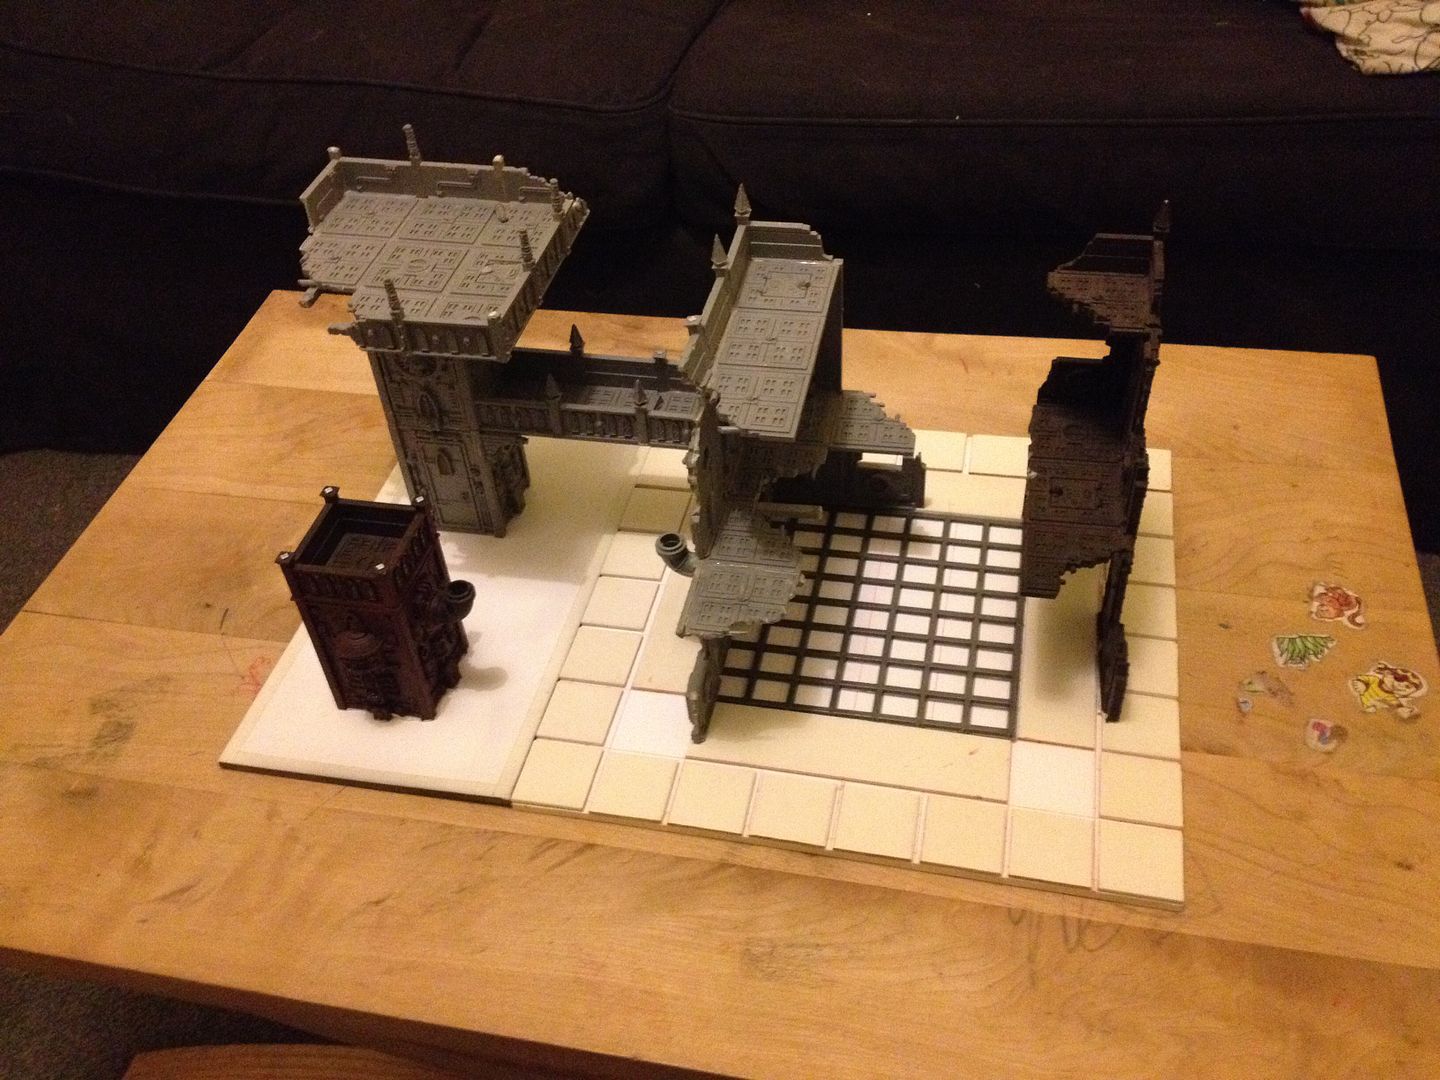 Sorry for the boring details ... I'm tired and there's no pen and paper to jot down notes so your getting everything as I work it out. I'm guessing my plan of making loads of modular terrain has been delayed slightly but it's not on hold as I'm having too much fun with the lads. Might have to keep this lot to the late night hobby sessions and the other bits for during the day. Just need the wife to not have the baby early and I might actually finish something this month! |
|
|
|
Post by Geifer on Apr 9, 2014 16:31:30 GMT
|
|
|
|
Post by sw1 on Apr 11, 2014 11:31:33 GMT
Spot on ... That was one of the ones I was thinking of. Will have a closer look at those pics later on. ---------------------------------- Mystery Phil came over last night for board games and general chat about all thing hobby. Looks like we're close to having access to his garage as a gaming space! Currently the gaming space at mine needs clearing away after play or risk small children having a go/breaking things. So large games are not really possible. Having space to leave stuff up would make decent sized battles more likely. So that's more motivation to get these completed ASAP. He's also got some boards painted up grey with textured paint which would make a good road surface so I don't have to work out sizes for roads to go in between. I might do a central road bit if we have a nigh highway road going through the centre of the city. Might also do some extra tiles which are mainly craters. Main issue is to get an overall thematic look without getting the surface that bumpy that you can't play on it. The more I work on this the more possibilities bounce around in my head! |
|
|
|
Post by Geifer on Apr 13, 2014 8:00:27 GMT
Spot on ... That was one of the ones I was thinking of. Will have a closer look at those pics later on. Glad I could help. Might also do some extra tiles which are mainly craters. Main issue is to get an overall thematic look without getting the surface that bumpy that you can't play on it. In my experience all craters is less fun than it sounds like. Looks a bit boring, and as you say you'll be short of space on which to place models. But if you do city terrain anyway, why not cut down on the number of craters and break things up with low walls as if the building that stood there has benn thoroughly obliterated. You still get cover, you get a different style of terrain in there for diversity and walls have the advantage of taking up little space and leaving lots for model placement. Have several big craters with plenty of space to place models inside, and litter the rest of the tile with tiny stones and sand and maybe the odd big piece of rubble. |
|
|
|
Post by sw1 on Apr 16, 2014 19:25:06 GMT
Time for a bit more of an update on the mounting boards. I've cut 2 more out and sealed the edges. The first one has had the central bit chopped out with a piece of cardboard stuck on the bottom and a bunch of bits glued onto the cardboard. I've also added some textured card to the edge squares of the mesh bit that's going over the hole. There's just different pipes and cables in this one rather than waiting to get hold of cogs or similar parts. This is where I'm now up to ... Without mesh: 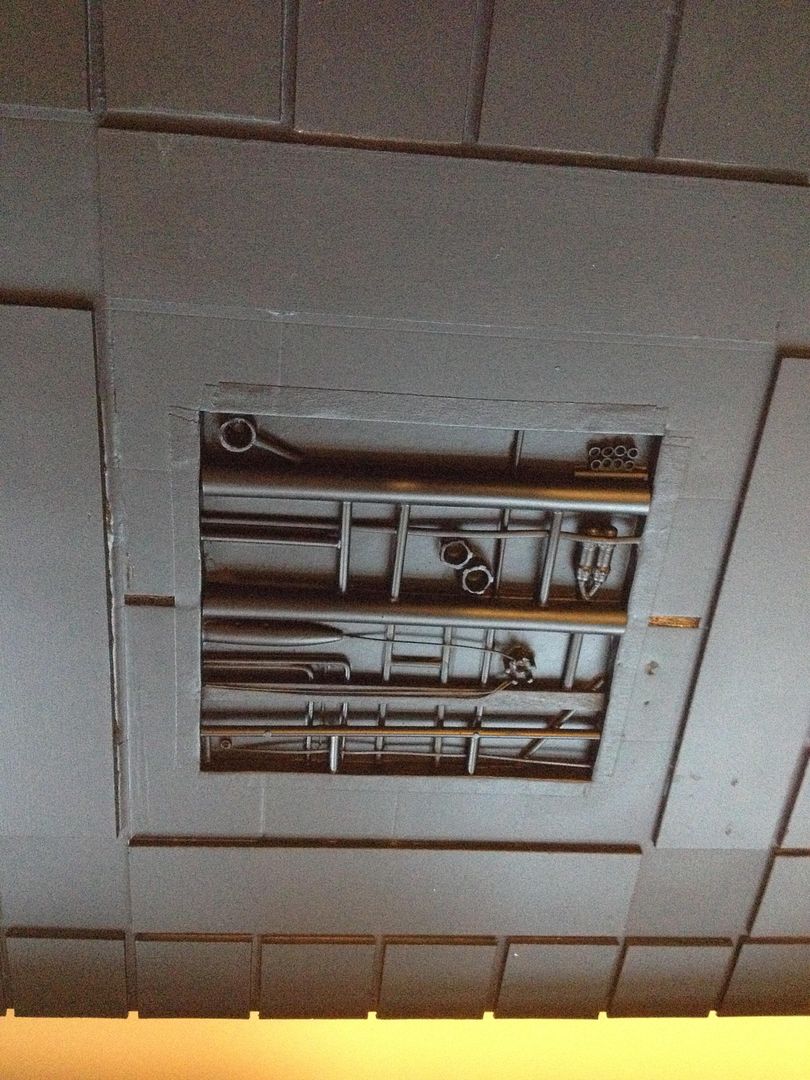 With mesh: 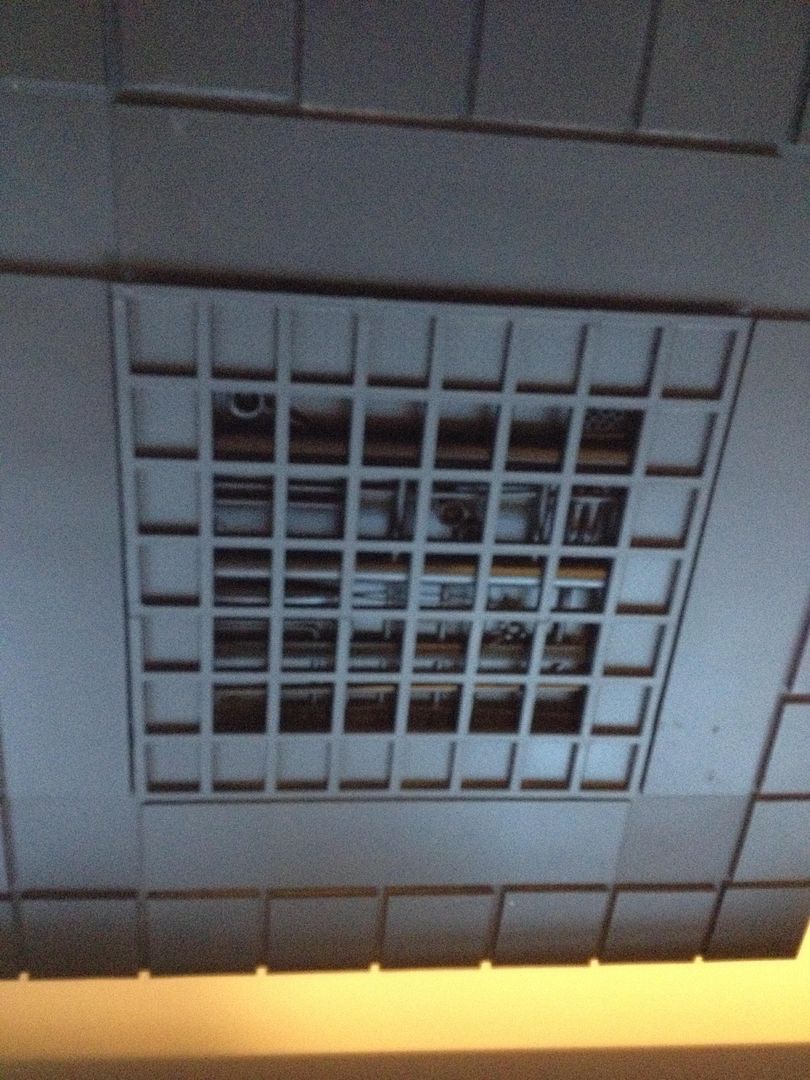 Sat under the 1st piece of scenery: 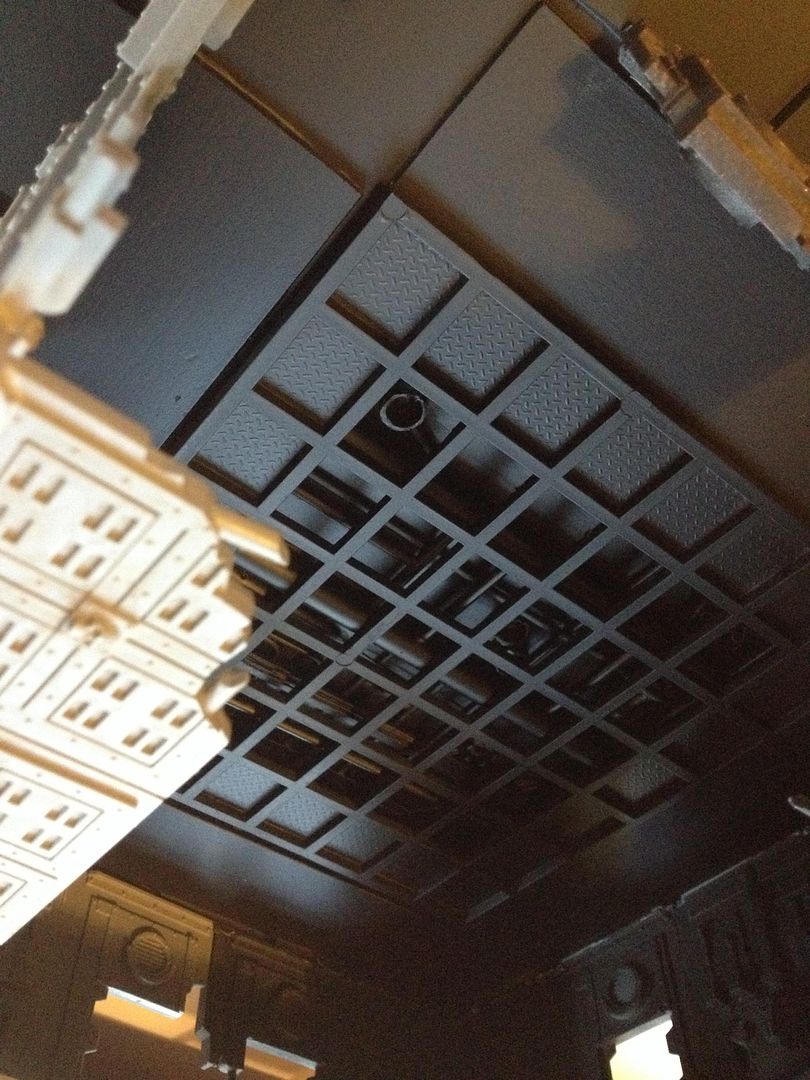 |
|
|
|
Post by sw1 on Apr 19, 2014 20:51:52 GMT
Not going to get home from work till 11ish but I've spent all day in work wanting to get a move on with the mounting base for the Admec piece if scenery. Even if it's just the pipes getting base coat of metal I'll be happy. Got to get back to the little and often routine in prep for the baby arriving. Managed to get hold of straws that are the right diameter to allow me to do some thinner pipe underneath and still have them going over the top. I think it's giving a false depth as I've got stuff layering over each other. So doing a bit more may give even more depth? Well that's what I'm hoping for. I think the bottom will be left matt black with just the pipes and other bits getting paint. I'll mask off the central bit after painting it and then spray the paved details with a grey spray I've got from the old pound shop. |
|
The Irontooth
Bloodclaw
 Tale of Gamers: 3 units, 4 pieces of terrain
Posts: 387
|
Post by The Irontooth on Apr 19, 2014 21:53:15 GMT
I really like the pipework in the floor. Really cool work!! |
|
|
|
Post by sw1 on Apr 20, 2014 1:09:45 GMT
Cheers mate. Took me a while to realise that a 5mm depth was enough to trick the eye a bit. Here's the pipe work with a quick lick of paint: 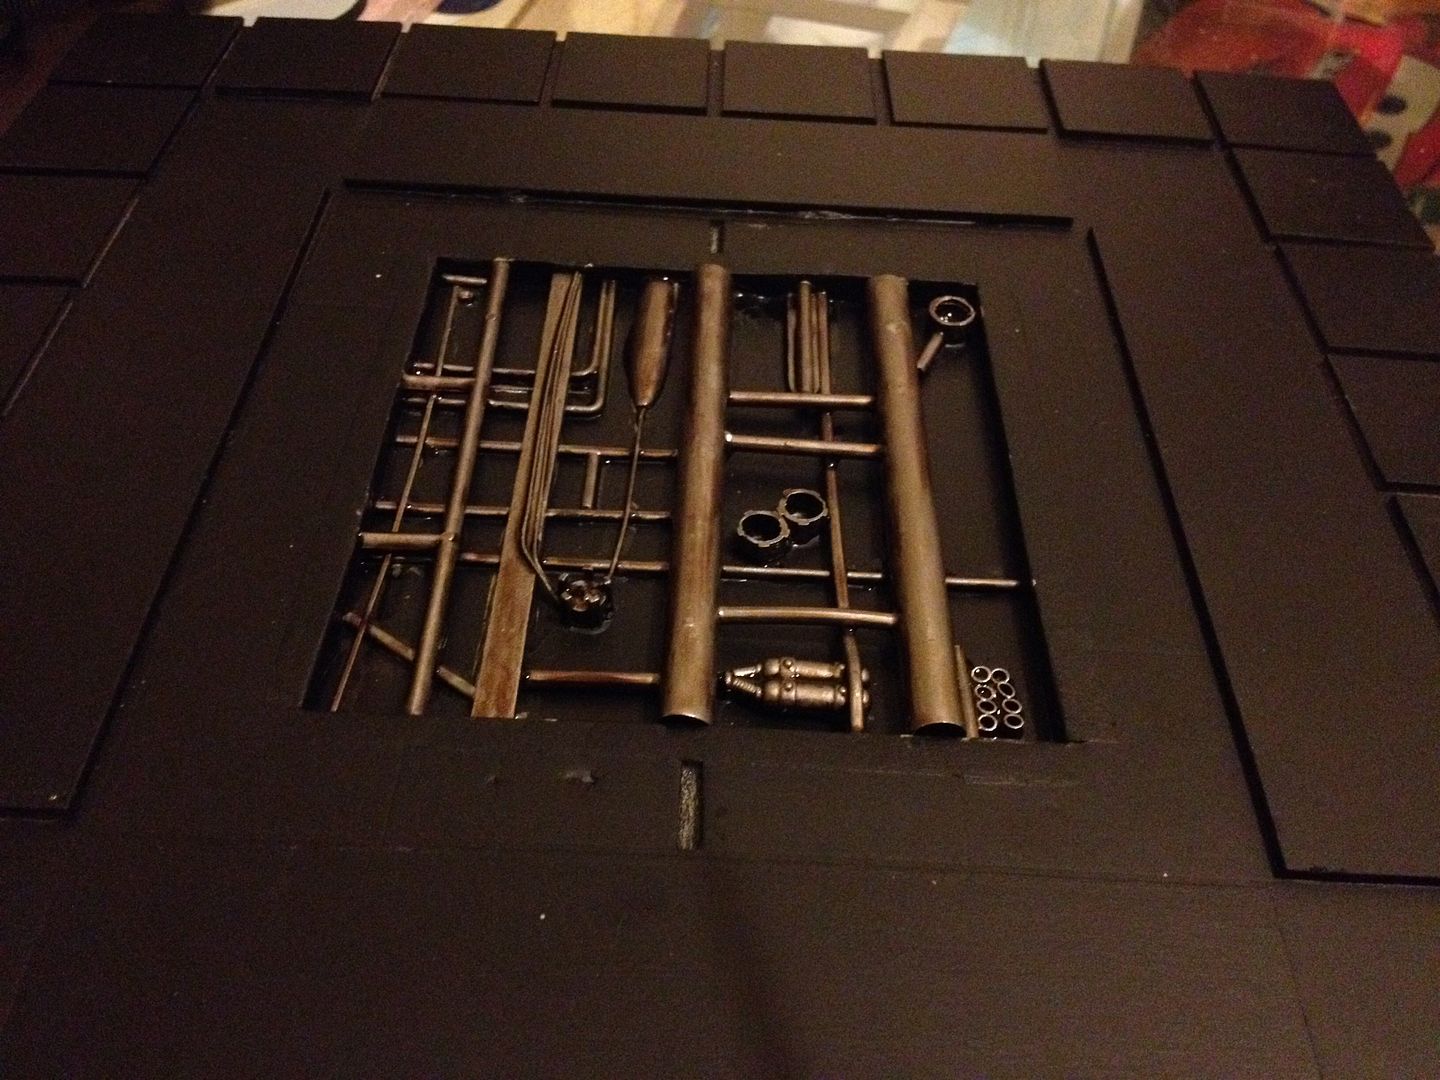 Which doesn't look that great, but when you add the grating over the top it ends up looking like this: 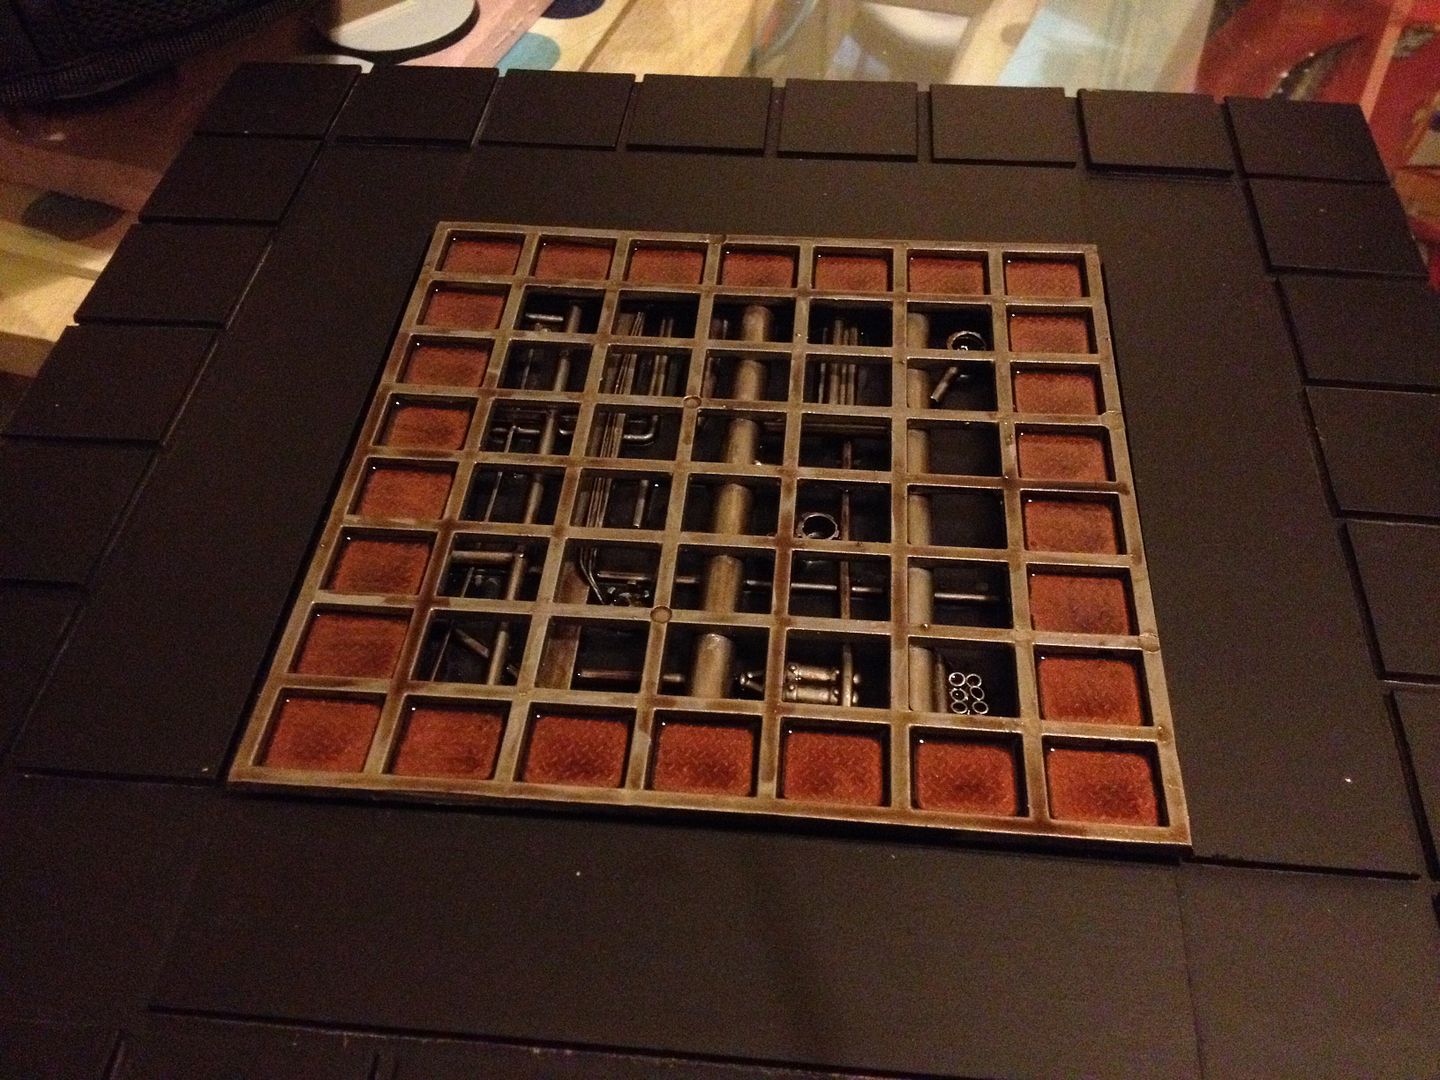 Quite happy with how it now looks. Might need to do a bit more with the washes depending on how they look when it's dry. For now though it'll do and I can crack on with the rest of it. |
|
|
|
Post by Geifer on Apr 20, 2014 7:20:06 GMT
Top work. That's some lovely detail below the grate. And yeah, what a difference that grate makes. |
|